 Macajor Auto
Macajor Auto
Macajor Auto
Front bumper LED lights face vibration, rain, road grit, and heat from nearby components. Their wiring must withstand those conditions, not just make the lamps turn on. A loose ground can cause flickering. An undersized cable may overheat under load, while an unfused power lead can leave a fault unchecked. Small details matter.
The NFPA report Vehicle Fires, based on 2018–2022 data, estimates about 215,000 highway vehicle fires annually in the United States. Those figures cover many causes; they do not mean auxiliary lights caused them. Still, they show why sound electrical installation deserves care. SAE J1128 also sets requirements for low-voltage primary cable, a useful reference when selecting automotive wire. Not glamorous, but important.
This guide explains how to wire LED lights on a front bumper bar with attention to circuit protection, cable sizing, grounding, and weather-resistant connections. A fuse placed near the power source helps protect the supply wire. A relay can keep higher lamp current out of a dash switch, when the light manufacturer’s instructions call for one. Route cables away from sharp edges, hot surfaces, and moving parts. Check the vehicle and lamp wiring diagrams before connecting anything; bumper layouts differ, and assumptions can be wrong. Proper wiring cannot prevent every failure, but careful choices make faults less likely and troubleshooting clearer.
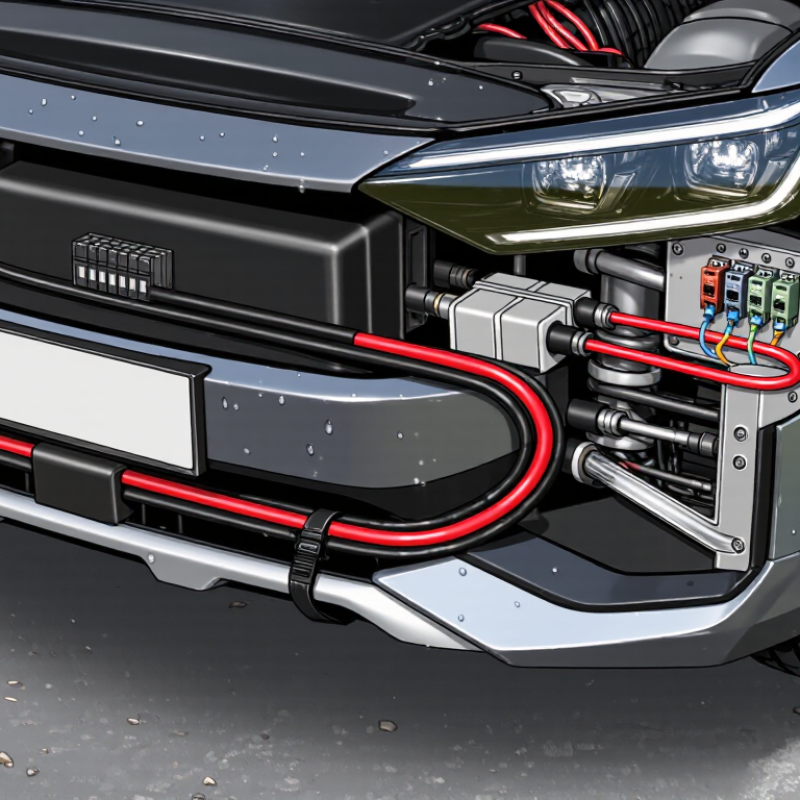
Front bumper LED lights need a stable electrical supply, not just a convenient wire to tap. Most vehicles use a 12-volt system, but charging voltage is higher. Check the light’s rated voltage and current draw before choosing any wiring. Add the current draw of multiple lights together. A circuit that looks adequate on paper may still overheat if the wire is too thin or the run is long. That detail is easy to miss.
Use a correctly rated fuse close to the power source, so the wire is protected if it shorts. Wire gauge should match the load and cable length; follow the light maker’s specifications or consult an automotive electrician. A relay can keep high current away from a dashboard switch. Keep connections away from road spray, sharp metal edges, and hot components. Use sealed connectors and secure the loom so it cannot rub against the bumper. Check the ground connection on clean metal. Then test the lights with the engine running and inspect for flickering or warm wires. A neat installation can still hide a poor connection. Recheck it after driving.
| Why Is Proper Wiring Important for Front Bumper LED Lights? - Electrical Requirements of Front Bumper LED Lights | |||
|---|---|---|---|
| Electrical Consideration | Practical Requirement | Example or Check | Why It Matters |
| Supply voltage | Check the LED light’s specified operating-voltage range and the vehicle’s electrical system before connecting it. | A conventional vehicle battery is nominally 12 V; charging-system voltage is usually higher while the engine is running. | Voltage outside the light’s specified range can cause poor performance, flickering, overheating, or damage. |
| Current draw | Use the light’s rated power and operating voltage to estimate current: current in amperes is approximately power in watts divided by voltage in volts. | A 36 W light draws about 3 A at 12 V; a 72 W light draws about 6 A at 12 V. | Correct current estimates help determine suitable wiring, connectors, switching, and circuit protection. |
| Wire size and voltage drop | Select automotive-grade copper wire based on current, total conductor length, installation temperature, and the permitted voltage drop. | For illustration, on a 12 V circuit with about 10 ft of total conductor length (outgoing and return combined), 16 AWG is a reasonable starting point for 5 A, 14 AWG for 10 A, and 12 AWG for 15 A when aiming for roughly 3% or less voltage drop. Verify the actual installation and applicable wire ratings. | Undersized or excessively long wiring can reduce light output and cause wire heating. |
| Fuse or circuit breaker | Protect the power wire with an appropriately rated fuse or circuit breaker placed close to the power source. Size protection to protect the wire and suit the light’s instructions. | Do not choose a fuse rating above the safe capacity of the smallest wire in the protected circuit. Account for any manufacturer-specified fuse rating or startup current. | Proper protection helps interrupt excessive current before wiring overheats or a short circuit causes damage. |
| Relay and switch | For loads that exceed a switch’s rated capacity, use a correctly rated relay. Route the high-current supply through the relay contacts and use the dashboard switch to control the relay coil. | Confirm the relay’s contact rating, coil voltage, terminal connections, and circuit protection are suitable for the installation. | A relay reduces the current carried by the control switch and can improve circuit reliability. |
| Ground connection | Use a secure, clean ground connection with a conductor sized appropriately for the return current, or use a dedicated return wire when needed. | Check for loose fasteners, paint, corrosion, and poor continuity at the grounding point. | A weak ground can cause dimming, flickering, intermittent operation, or unwanted current paths. |
| Connectors and routing | Use connectors rated for the circuit and environment. Protect wiring from sharp edges, heat, moisture, moving parts, and road debris. | Use suitable grommets, abrasion protection, strain relief, and sealed connections where exposure is expected. | Good routing and secure connections help prevent shorts, corrosion, and failures caused by vibration or water. |
| Installation testing | Before regular use, inspect the circuit and test the lights with the engine off and running. Check for abnormal heat, flicker, and voltage drop. | Measure voltage at the light under load and compare it with the supply voltage and the light’s specified operating range. | Testing can reveal wiring, grounding, or protection problems before they cause damage or unreliable lighting. |
| Note: Wire-size examples are planning estimates, not a substitute for the light manufacturer’s instructions, applicable vehicle wiring standards, or a qualified installer’s assessment. Actual requirements depend on conductor length, routing, temperature, bundling, and the specific components used. | |||
Long or thin wires can cause voltage drop when the lights draw more current. Check the wiring and connections.
Match the wire to the lights’ current draw and cable length. Check the light instructions instead of guessing.
A relay lets a low-current switch control power from the battery. It reduces the load on the switch circuit.
Place a correctly rated fuse close to the battery. It helps protect the power wire if a short occurs.
Attach it to clean, bare metal, then secure and protect it against corrosion. A painted surface may cause trouble.
Keep wires away from sharp edges, hot parts, and moving components. Leave movement slack, but keep cables clear of tires.
Inspect grounds, connectors, and damaged insulation before blaming the lights. Small faults can hide behind the grille.
Ask a qualified automotive electrician if wire ratings, fuse sizing, or cable routing are uncertain. I would recheck everything after the first drive, too.
Proper wiring is essential for front bumper LED lights because these lights need a stable power supply to perform reliably. A well-planned circuit helps prevent flickering, dimming, and excessive strain on electrical components. Understanding how to wire LED lights on a front bumper bar includes choosing suitable wiring and connectors, protecting the circuit with an appropriately rated fuse, and using a secure switch and ground connection.
Incorrect wiring can cause short circuits, overheating, or damage to the lights and vehicle electrical system. Each component has a specific role in delivering and controlling power, so connections should be insulated, secured, and protected from moisture and road debris. After installation, test the lights and inspect the circuit for loose connections, unusual heat, or inconsistent operation. Regular checks help keep the lighting system safe, dependable, and ready for use.
