 Macajor Auto
Macajor Auto
Macajor Auto
A roof rack should carry your gear, not announce every mile with a sharp, rising whistle. Many drivers ask, “why is my car roof rack whistling,” especially after installing crossbars, a cargo box, or new mounting feet. The sound usually comes from turbulent air striking a flat edge, loose accessory, or uncovered channel. It can become louder above 45 miles per hour, then change pitch near bridges, trucks, or strong crosswinds.
Richard Reina, an automotive technician and former CARiD Training Director, offers a useful principle: “Small changes in airflow can create surprisingly loud cabin noise.” That observation matters because the rack may be secure while still producing turbulence. Check the bar direction, mounting position, rubber strips, end caps, and unused T-slots. A missing cover can act like a tiny flute. It sounds ridiculous, but it happens.
Start with a careful visual inspection. Then remove one accessory at a time and take a short test drive. Do not simply tighten every bolt. Excessive force can damage clamps, rails, or threaded inserts. Temporary painter’s tape over a suspected gap can help identify the source, though it is only a diagnostic step. I have found that owners often blame the crossbar immediately, while the real culprit is a loose fairing or an empty channel.
The solution may involve repositioning the bars, fitting a fairing, replacing damaged seals, or adding manufacturer-approved channel strips. Avoid improvised cords or unstable coverings. They may reduce noise briefly, but they can loosen at speed. A quiet rack is valuable. A properly secured rack matters more.
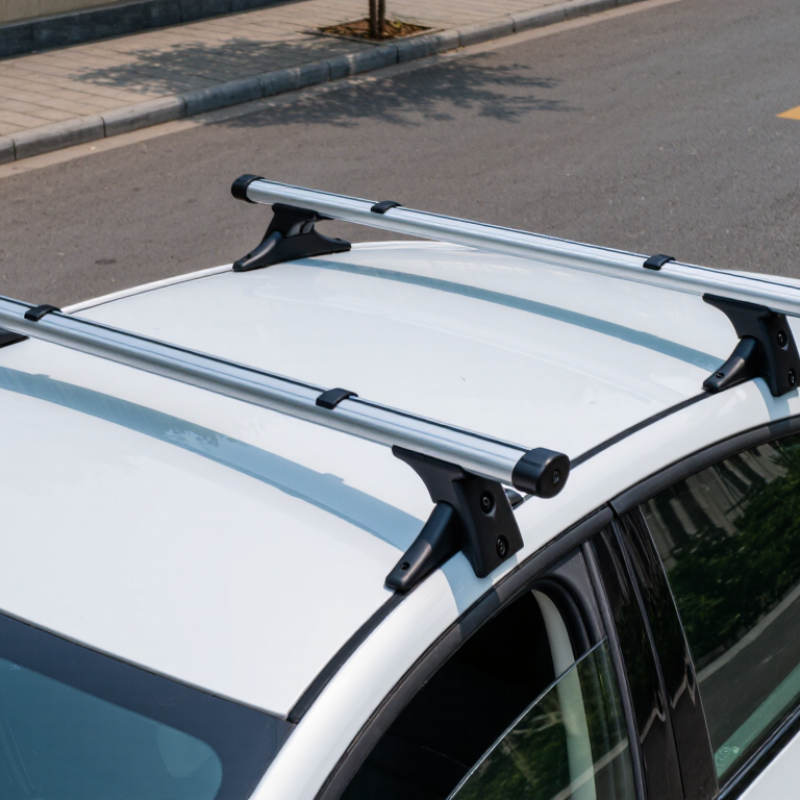
Roof-rack whistling is usually an airflow problem, not a mechanical failure. Air strikes the front crossbar, then separates around its edges and creates pressure pulses. These pulses become the sharp, flute-like sound heard inside the cabin. A square bar, exposed mounting slot, or missing end cap can intensify the turbulence. Small gaps matter.
Position is another major cause. Crossbars placed too close together can create unstable airflow between them. A bar mounted too far forward may also disturb air flowing over the windshield. The U.S. Department of Energy’s FuelEconomy.gov reports that roof cargo can reduce highway fuel economy by approximately 6% to 17%. That range shows how strongly external equipment affects airflow, although it does not measure noise directly. In practical checks, I listen at 40, 60, and 80 km/h, because the whistle often appears only within a narrow speed range.
Loose hardware can produce a different sound. It may rattle, buzz, or whistle when a slot cover lifts slightly. Check every bolt, rubber strip, end cap, and clamp by hand before changing the design. Do not confuse wind noise with unsafe exposure, but NIOSH’s Criteria for a Recommended Standard: Occupational Noise Exposure identifies 85 dBA over eight hours as a reference limit for workplace exposure. A phone app cannot replace calibrated testing. Still, it can reveal a useful pattern. I once blamed the crossbar, then found a displaced rubber insert. The diagnosis was imperfect, but the airflow trail was clear.
| Main Cause | What Happens | Typical Clues | Recommended Action | Priority |
|---|---|---|---|---|
| Exposed crossbar channels | Air enters open grooves or mounting slots and creates turbulent airflow. | A high-pitched tone begins shortly after the vehicle reaches moderate road speed. | Install the correct channel strips or aerodynamic inserts and ensure they sit flush. | High |
| Loose or missing end caps | Gaps at the bar ends disturb the airflow and may allow the bar to vibrate. | The whistle is strongest near one end of the crossbar or changes when the cap is pressed. | Replace damaged caps, check the retaining tabs, and make sure each cap is fully seated. | High |
| Incorrect crossbar position | The bar sits in a turbulent area or creates an uneven gap between the front and rear bars. | The sound changes after the bars are moved forward or backward by a small amount. | Use the vehicle and rack installation measurements, then tighten the mounts evenly. | High |
| Loose mounting hardware | Small movements in the feet, clamps, or fasteners produce vibration and aerodynamic noise. | The noise is accompanied by rattling, movement, or a bar that does not feel secure. | Stop driving at higher speeds, inspect all fasteners, and tighten them to the specified torque. | Critical |
| Damaged or distorted bar profile | Dents, bends, or deformation interrupt the intended aerodynamic shape. | The bar appears uneven, has visible impact damage, or whistles even after the channels are covered. | Remove the damaged component and replace it; do not attempt to straighten a structural part. | Critical |
| Added accessories | Bike mounts, cargo boxes, kayak supports, and other attachments create additional turbulence. | The whistle appears only when a particular accessory is installed. | Check the accessory alignment, cover unused mounting slots, and remove accessories when not needed. | High |
| Excessive load or poor load placement | An uneven or oversized load changes airflow and may increase vibration around the rack. | The sound begins only after loading and varies with the load's shape or position. | Stay within the vehicle and rack load limits, center the load, and secure loose straps. | Critical |
| Loose straps or tie-down ends | Straps flutter rapidly in the airflow and can sound like a roof rack whistle. | The noise is irregular and may change when a window is opened or the strap is held still. | Secure, fold, or remove excess strap material and inspect it for fraying. | High |
| Wind direction and vehicle speed | Crosswinds and speed can excite an otherwise quiet rack and make the tone more noticeable. | The sound changes on different roads, during crosswinds, or within a particular speed range. | Confirm the rack is correctly installed first, then test it under similar conditions after each adjustment. | Medium |
Fast air strikes the front crossbar and separates around its edges. These pressure changes create a sharp, flute-like sound. Square bars, open slots, and missing end caps can worsen turbulence. Small gaps matter.
Yes. Crossbars placed too close together can create unstable airflow. A bar mounted too far forward may disturb air above the windshield. Check that both bars remain parallel, centered, and evenly spaced.
Park on level ground and use bright light. Check end caps, rubber strips, covers, bolts, clamps, and mounting feet. Feel along each bar for raised edges or loose parts. Look underneath the mounting pads.
Loose hardware may rattle, buzz, or whistle. An open channel or lifted slot cover can act like a tiny flute. Secure each fastener according to its specified setting. Do not overtighten it.
Often, yes. It redirects air over the front crossbar. Fit it close to the bar, following the required clearance. An uneven bracket can create another whistle. Check every clamp by hand.
Install correctly fitted rubber inserts or channel strips. They can reduce airflow through exposed gaps. Do not block drainage paths or exceed the rack’s load limit. The result may not be silent.
Test at about 40, 60, and 80 kilometers per hour in a safe, legal area. Change only one part at a time. Remove unnecessary attachments before testing. My rushed test taught me almost nothing.
Yes, unused roof equipment can increase aerodynamic drag. Highway fuel use may rise noticeably, depending on speed and vehicle shape. Removing the rack when unnecessary can reduce airflow resistance. Noise may improve too.
A whistling roof rack is usually caused by turbulent air passing over loose, uneven, or poorly positioned components. If you are wondering, “why is my car roof rack whistling,” begin by checking the crossbars, rack surface, mounting feet, rubber strips, and connection points. Look for gaps, damaged parts, missing covers, or dirt that may interrupt smooth airflow. Make sure every fastener is secure, but avoid overtightening, which could damage the rack or vehicle.
Next, adjust the crossbars so they are evenly aligned and positioned according to the rack’s installation guidance. Filling open channels with suitable rubber inserts or adding a properly fitted wind deflector can reduce airflow gaps and lower noise. After making adjustments, drive at different speeds and listen for changes. Regularly inspect the rack, clean its components, and retighten connections when necessary. These simple maintenance steps can improve stability, reduce whistling, and create a quieter, more comfortable driving experience.
