Macajor Auto
If you're wondering, "can I install a roof rack without rails?", you're not alone. Many vehicle owners face this question. According to Todd McCarthy, a roof rack expert, "Installing a roof rack without rails can be tricky, but it's definitely possible." The right approach makes all the difference.
Roof racks offer versatile storage options for outdoor gear and luggage. However, vehicles without built-in rails pose unique challenges. Some solutions involve using clamps or straps that fit snugly over the vehicle's roof. These methods can be effective if executed properly, but they require careful measurement and attention to detail. Improper installation risks damaging the vehicle or compromising safety.
Understanding your specific vehicle model is vital. There are aftermarket options designed specifically for cars without rails. Researching those can save time and ensure a secure fit. The process can be slightly frustrating for beginners. Seeking advice from trusted sources can help enhance the experience. Remember, effective roof rack installation can greatly benefit your adventures while keeping your vehicle intact.
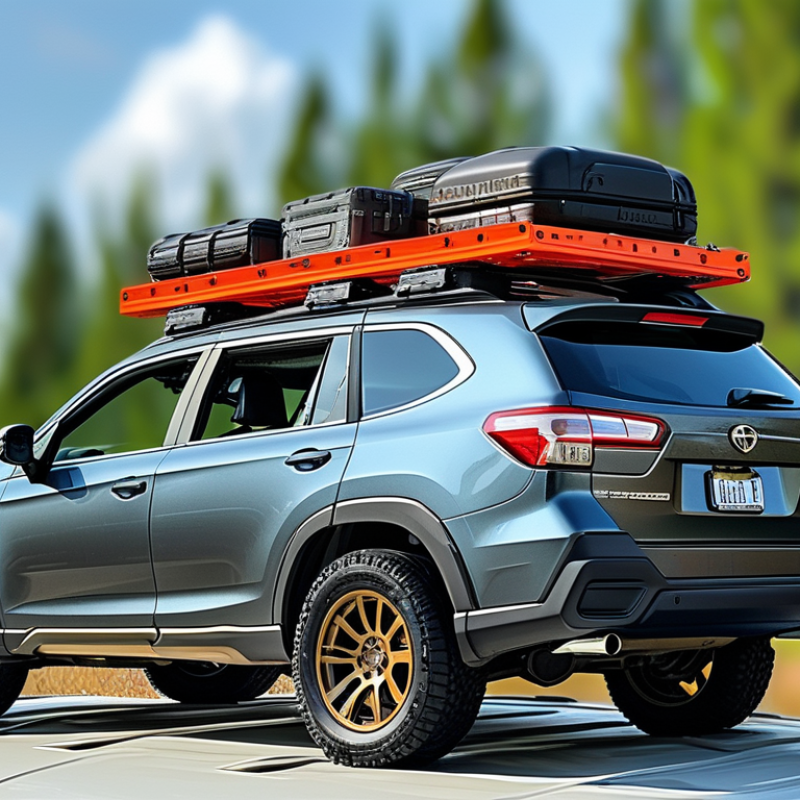
When choosing a roof rack for vehicles without rails, it's essential to consider various types. A traditional roof rack is a classic choice. These racks attach directly to the vehicle’s roof. They offer a stable base for cargo. However, installation might challenge inexperienced users. Each model can vary in complexity. This variability makes careful research necessary.
Another appealing option is a clamp-on roof rack. These models utilize clamps to secure the rack to the roof. They often adjust to different vehicle shapes. While they’re easier to install, their fit might not be as secure as traditional racks. The risk of movement poses a concern during long trips. Keep in mind that a less secure rack can affect safety.
Finally, consider a universal roof rack. Designed to fit many cars, its versatility is attractive. However, universal racks may not provide the perfect fit. This can lead to wear over time. Potential buyers should assess their needs thoroughly. Each type of roof rack may come with pros and cons. Understanding these differences is crucial. Selecting the right rack takes time and energy. It’s a process worth undertaking for safe travels.
When installing a roof rack without rails, having the right tools and materials is crucial. Start by gathering essential tools like a cordless drill, measuring tape, and socket set. These items help ensure accurate measurements and secure installation. You’ll need mounting brackets, rubber pads, and clamps to attach your roof rack safely to the vehicle’s roof.
A quality installation starts with accurate measurements. Measure the width of your vehicle and the desired position for the rack. Make sure to consider the height of your load when choosing the mounting points. Using a level can prevent an uneven fit. After marking the spots, you can drill pilot holes for the screws. If you’re unsure about any step, take your time. Don’t rush—a hasty installation can lead to issues down the line.
Before finalizing installation, double-check all brackets and clamps. A secure fit is key to safety and durability. If you forget to tighten a screw, it may cause problems later. Testing the stability of the rack after installation is vital. Load it lightly first to ensure everything is secure before adding heavier items. This precaution helps identify potential weaknesses in your setup.
| Method | Tools Required | Materials Needed | Installation Difficulty |
|---|---|---|---|
| Universal Mounting Kit | Wrench, Screwdriver | Mounting brackets | Moderate |
| Foam Block Method | Measuring tape, Duct tape | Foam blocks | Easy |
| Clamps and Straps | Ratchet straps, Pliers | Heavy-duty straps | Moderate |
| Vents and Roof Trim | Drill, Screwdriver | Sealant tape | Difficult |
| Adhesive Mount System | Cleaner, Cloth | Adhesive pads | Easy |
| T-Slot Mounting System | Hex key, Wrench | T-slot rails | Moderate |
| Suction Cup Mount | None | Suction cup rack | Easy |
| Roof Bag with Attachment | None | Roof bag | Very Easy |
| Wooden Cross Bars | Saw, Drill | Wooden boards | Difficult |
| Custom Fabrication | Welding tools, Drill | Metal components | Very Difficult |
Installing a roof rack on a flat roof can seem daunting, but with the right approach, it's quite manageable. Begin by gathering your tools: a measuring tape, drill, and heavy-duty adhesive. These items are essential for ensuring a secure installation. Measuring the roof area accurately prevents potential issues later. Make sure the surface is clean; dirt or debris can prevent proper adhesion.
To begin mounting, position the roof rack’s base on the roof. The placement should be uniform, ensuring equal weight distribution across the rack. Consider using a level to check alignment. Drill holes into the roof if needed, but ensure they are not too deep; this could lead to leaks or damage. If possible, use a waterproof sealant around bolts and screws to enhance durability.
Once everything is in place, take a moment to inspect your work. Sometimes, it’s easy to overlook small details like misalignment or loose anchors. Reflect on the installation process. Could you have chosen better materials? Was there a step that felt rushed? Taking your time during installation is key to ensuring reliability and safety in the long run.
When securing your roof rack, be mindful of several key factors. Choose appropriate tie-down straps that can bear the weight of your gear. Industry reports show that a typical roof rack can hold around 150 pounds. However, overloading it can affect your vehicle's handling and safety. Ensure your straps are tightly secured and that they don’t obstruct your view. Regularly inspect them for wear and tear, as frayed straps can lead to disastrous results.
Adjusting your roof rack properly is essential for ease of use and stability. Mount the rack as low as possible while still clearing the roof. This lowers the center of gravity, enhancing vehicle stability. According to a study from the National Highway Traffic Safety Administration (NHTSA), improperly secured loads contribute to significant accidents every year. Before hitting the road, check for any loose components. It’s better to take a little extra time now than to deal with potential issues later.
When driving with a roof rack installed, safety considerations should be a priority. A study from the National Highway Traffic Safety Administration (NHTSA) highlights that vehicles equipped with roof racks can experience increased rollover risk by up to 20%. This statistic emphasizes the importance of proper weight distribution and secure loading to maintain vehicle stability. Overloading the rack can lead to dangerous situations, particularly during sharp turns or sudden maneuvers.
Proper installation and load management are essential. Ensure that the roof rack is fixed securely; a loose rack can create noise and vibration, distracting the driver. According to data from the Insurance Institute for Highway Safety (IIHS), cargo that is not secured properly may block rear visibility. It's crucial to regularly check the tie-downs and fittings, especially on long journeys. The weight on the roof directly affects the center of gravity, impacting handling and braking.
Driving habits must also adapt when using a roof rack. Slower speeds can help maintain control, especially in windy conditions. The added height alters how the vehicle navigates under overpasses and bridges. Awareness of clearance becomes essential; a roof rack can increase overall vehicle height by several inches. Lastly, ensure that you check local regulations regarding roof cargo loads. Laws differ, and following them ensures safety and compliance on the road.
: You can select traditional racks, clamp-on racks, or universal racks. Each type has its benefits and drawbacks.
Traditional racks attach directly to the roof. They provide a stable base for cargo but may require effort to install.
Clamp-on racks use clamps for installation, making them easier to set up. However, their fit might not be as secure.
Universal racks fit many vehicles and offer versatility, but they might not provide a perfect fit over time.
Essential tools include a cordless drill, measuring tape, and socket set for secure installation and accurate measurements.
Measure carefully, drill pilot holes, and double-check all brackets. A loose installation may lead to safety issues later.
Proper load management and installation are crucial to avoid increased rollover risks. Regularly check tie-downs during long journeys.
A roof rack increases the vehicle's height, impacting navigation under overpasses. Awareness of clearance is critical while driving.
Proper weight distribution maintains vehicle stability and reduces rollover risk, especially during sharp turns or sudden maneuvers.
Take your time and don’t rush. A hasty setup can create problems down the line, so be patient during installation.
Installing a roof rack on a vehicle without rails might seem challenging, but it is entirely feasible with the right approach. The first step involves choosing the appropriate type of roof rack specifically designed for flat roofs. Once you have your roof rack chosen, gather the necessary tools and materials to facilitate a smooth installation process. The article provides a comprehensive step-by-step guide for mounting the rack effectively while ensuring optimal security and adjustment.
Safety is crucial when driving with a roof rack, and this article emphasizes the need to follow proper installation techniques. By addressing common concerns such as "can I install a roof rack without rails," it reassures readers that they can enjoy additional cargo space without compromising vehicle integrity. Overall, with careful planning and execution, you can successfully install a roof rack that meets your adventure needs.
