 Macajor Auto
Macajor Auto
Macajor Auto
Installing side step bars can improve cab access, protect lower doors, and give a truck a more finished appearance. However, a strong result depends on careful preparation, correct fitment, and patience under the vehicle. This guide explains how to install auto side step bars through seven practical tips, from identifying mounting points to checking final clearance. It focuses on details that are easy to overlook, including uneven brackets, hidden wiring, painted surfaces, and loose hardware.
Automotive technical trainer Richard Reina offers a useful reminder: “A clean installation starts with checking fitment before touching a drill.” That advice matters. Many modern trucks use factory holes, but their locations and thread conditions can differ between trims. Read the vehicle manual and the bar manufacturer’s instructions together. Do not trust appearance alone.
Safety comes first.
Use stable ramps or properly rated jack stands on level ground. Keep hands clear of pinch points, and support long bars before removing packaging straps. Test-fit each bracket loosely, then inspect door movement, ground clearance, and exhaust proximity. A small alignment error can create rattles after several drives. It may also leave one end sitting visibly lower.
The seven tips ahead are practical, but not flawless. Instructions can be vague, supplied hardware can vary, and a bolt may refuse to start. Stop and reassess rather than forcing it. A torque wrench, flashlight, trim tool, measuring tape, and thread-cleaning brush will make the work more controlled. If the mounting structure is damaged or the fit remains uncertain, consult a qualified installer before driving.
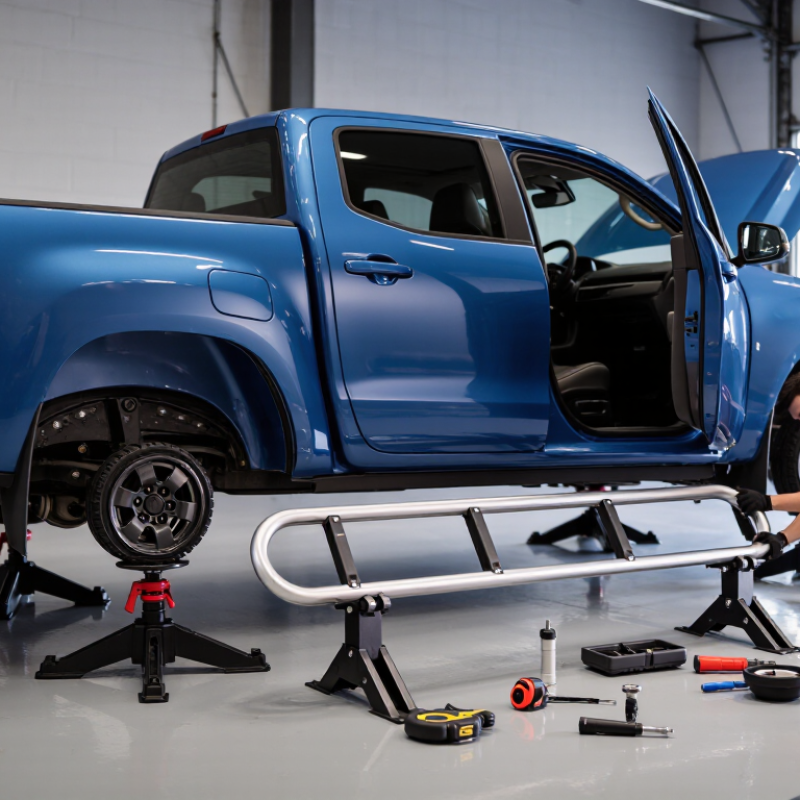
7 Best Tips for Installing Auto Side Step Bars
Choose the Right Side Step Bars for Your Vehicle
Start with your vehicle’s exact year, model, body style, and cab length. Side step bars are not universal, even when two vehicles look nearly identical. Check the mounting points beneath the rocker panels before ordering. Factory holes are useful, but their spacing can vary between trims.
Select a bar that supports your daily needs. A wide, textured step suits muddy boots and frequent entry. A narrower design may provide better ground clearance for rocky roads. Measure the bar’s width, drop, and distance from the doors. Leave enough room for doors, hinges, and moving suspension parts. Check the weight rating carefully. It should exceed the heaviest expected user. Do not guess here.
Material also matters. Powder-coated steel handles tough use, while aluminum reduces weight and resists corrosion. Inspect welds, brackets, and tread surfaces for uneven finishing. I once chose a step by appearance alone, then found the bracket interfered with a plastic panel. That mistake cost extra time. Measure twice. Installation usually needs a torque wrench, level, socket set, and a second person. Follow the supplied instructions, but compare them with your vehicle’s manual. Tighten fasteners evenly, and recheck them after several drives. A final door-clearance test can reveal problems before the first muddy trip.
| Tip | What to Check | Recommended Guideline | Installation Detail | Final Safety Check |
|---|---|---|---|---|
| 1. Confirm vehicle compatibility | Vehicle year, make, model, body style, cab length, and existing underbody equipment. | Choose bars specifically listed for the exact vehicle configuration. Avoid assuming that parts for a similar model will fit. | Check mounting-hole locations and confirm whether the vehicle has factory steps, skid plates, running-board brackets, or other accessories. | Both bars should sit symmetrically and must not interfere with doors, parking sensors, exhaust components, or suspension movement. |
| 2. Select a suitable step design | Tube diameter, step-pad width, clearance, construction, and intended use. | A step surface about 4–6 inches wide generally provides practical foot placement for daily entry. Larger pads may improve access on lifted vehicles. | Choose a design that matches the vehicle’s ground clearance and rocker-panel position. Rock sliders and side steps are not interchangeable products. | The step should provide a stable, non-slip surface without creating a sharp projection beyond the vehicle body. |
| 3. Inspect materials and corrosion protection | Steel or aluminum construction, weld quality, coating, drainage, and hardware material. | Powder-coated steel is commonly selected for high strength, while aluminum reduces weight and resists corrosion. Stainless hardware is useful in wet or salty environments. | Inspect welds and coating before installation. Keep drain holes clear so water and road debris do not remain inside tubular sections. | Do not install bars with cracked welds, exposed bare metal, distorted brackets, or damaged threads. |
| 4. Prepare the mounting area | Rust, dirt, undercoating thickness, hidden wiring, and access to factory mounting points. | Clean the contact areas and use the existing reinforced mounting points whenever possible. Drilling should only be performed when the vehicle and installation instructions permit it. | Support the vehicle securely on level ground; never rely on a jack alone while working underneath it. Protect nearby wiring and brake lines. | All brackets must sit flush against their mounting surfaces, with no trapped debris or uneven gaps. |
| 5. Use the correct hardware and torque | Bolt grade, washer placement, thread engagement, and the vehicle or kit torque specification. | Use only the supplied or specified hardware. Tighten fasteners with a calibrated torque wrench rather than estimating by hand. | Start all bolts by hand, align the brackets, then tighten evenly. Follow the installation instructions because torque values vary by fastener size, grade, and application. | No bolt should be cross-threaded, missing a washer, bottomed out before clamping, or left with visibly insufficient thread engagement. |
| 6. Set the correct position and clearance | Door clearance, step height, rocker-panel protection, ground clearance, and exhaust heat. | Position the step where users can enter naturally while maintaining clearance from moving, hot, and flexible components. | Open and close every door after loosely positioning the bars. Check clearance through steering, suspension, and exhaust travel where applicable. | The bars must not contact the body during normal operation, and the step surface should be level from front to rear. |
| 7. Test, recheck, and maintain | Movement, noise, fastener tightness, coating damage, and accumulated mud or salt. | Perform a stationary load test before driving, then inspect the installation again after the first short drive and periodically thereafter. | Apply firm hand pressure at several points on each bar. Recheck all accessible fasteners and clean the step surface regularly. | Stop using the vehicle step if there is looseness, cracking, unusual movement, corrosion around a bracket, or contact with the vehicle body. |
Note: Vehicle-specific installation instructions and manufacturer-specified torque values take priority over general guidelines.
Park on a flat, solid surface with space to open both doors. Good lighting helps. Keep children, pets, and loose clothing away.
Gather a socket set, ratchet, torque wrench, trim tools, gloves, and a small flashlight. Use separate containers for different fasteners.
Use approved lifting equipment only when extra clearance is necessary. Support the vehicle securely. Never rely on a hydraulic jack alone.
Place each fastener group in a labeled container. Check bolt lengths before installation. I once assumed every bolt matched. That slowed everything down.
Inspect each frame hole for plugs, dirt, loose rust, or paint flakes. Clean threads with a brush. Apply thread treatment only when instructions permit.
Test-fit every bracket before tightening hardware. Confirm the brackets match the correct frame holes. Check door clearance, tire movement, and exhaust heat.
Start every bolt by hand, then tighten gradually from the center outward. Install washers and spacers in the stated direction. Finish with a calibrated torque wrench.
Test the step with both feet and inspect for movement or pinch points. Check the bodywork for scratches. Recheck fasteners after the first short drive.
Do not drill or modify the frame unless the instructions specifically allow it. Measure twice. I still rush sometimes, and small looseness can become serious.
Installing auto side step bars successfully begins with choosing a set that matches your vehicle’s model, body design, weight requirements, and intended use. Before starting, gather essential tools such as sockets, wrenches, a torque wrench, protective gloves, and a stable work light. Park on a level surface, engage the parking brake, and clear the installation area to create a safe and organized workspace. Reviewing the vehicle’s underside and the step bar instructions beforehand can also help prevent confusion during installation.
To understand how to install auto side step bars, first identify the correct mounting points, frame holes, and support brackets without drilling or modifying structural parts unless specifically required. Loosely attach the brackets, position the bars evenly on both sides, and gradually tighten all hardware according to the recommended sequence. After installation, check that the bars are level, centered, and free from contact with doors, tires, exhaust components, or moving parts. Finally, inspect every fastener, apply firm hand pressure to test stability, and perform a cautious final check before regular use.
