Macajor Auto Macajor Auto

Top 10 Ways a Roof Rack Can Scratch Your Car Paint?

Time:2026-09-30 Author:Isabella
0%

A roof rack can carry bikes, kayaks, or a loaded cargo box, but poor fit and careless handling may leave marks on your car’s finish. So, can a roof rack scratch your car paint? Yes. Scratches can happen when grit gets trapped beneath mounting feet, straps rub against the roof, or bulky gear shifts during a drive. Even a rack that looks secure may move slightly if its clamps are loose or installed incorrectly. Small contact points matter. Dust and sand can act like fine abrasive paper between the rack and paint. The damage may start as faint scuffs, then become easier to see in direct sunlight.

This guide examines 10 common ways roof racks can scratch paint and explains what drivers can check before and after installation. Look closely at the mounting pads, roof edges, door-frame contact points, and any areas where straps touch the vehicle. Clean surfaces and follow the rack maker’s fit and tightening instructions; designs vary, so one setup may not suit every car. Avoid guessing. If a pad is worn, missing, or visibly misaligned, stop and correct the fit before loading gear. A quick inspection cannot prevent every mark, and some damage may have another cause. Still, noticing grit, movement, or pressure points early can help reduce avoidable wear and protect the finish over time.
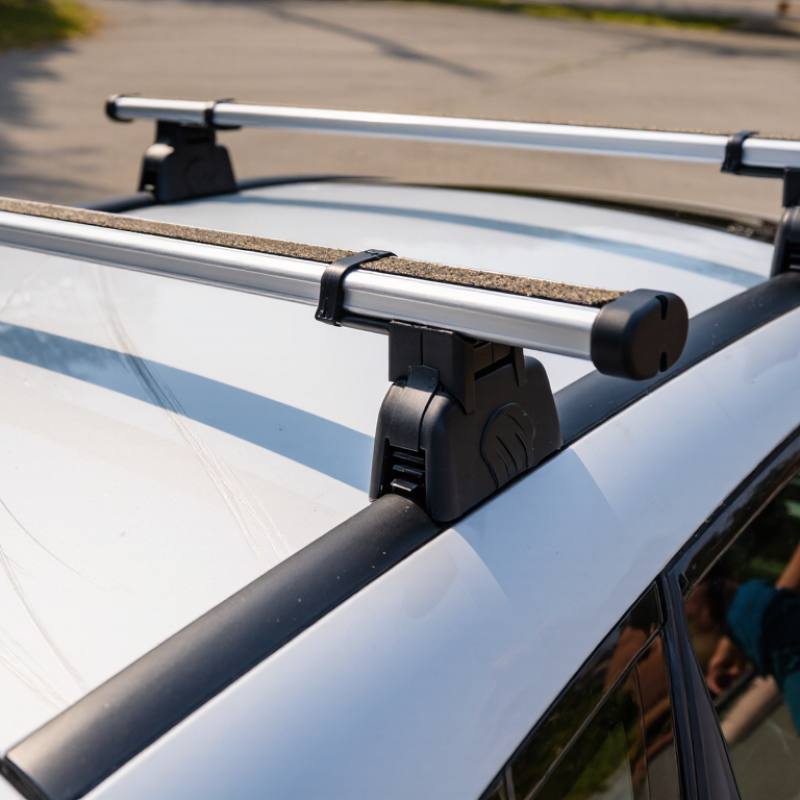
Top 10 Ways a Roof Rack Can Scratch Your Car Paint?

How Roof Rack Components Come Into Contact With Car Paint

A roof rack can scratch paint when its components touch the vehicle during installation or driving. Rubber feet may slide across the roof if they are placed on dusty paint. Small grains of sand become abrasive between the foot and the clear coat. It only takes a few miles.

Clamps create another contact point. If a clamp sits too close to the door edge, closing the door can pull it against the painted frame. Loose crossbars may vibrate and rub repeatedly against their mounting feet. Straps can also move in strong wind, especially when their loose ends strike the roof. Buckles and hooks are harsher than they look. They can leave narrow chips or crescent-shaped marks.

Moisture makes the problem less obvious. Water traps dirt beneath pads, while temperature changes soften some protective materials. I have found that cleaning only the visible roof is not enough; the underside of each foot needs attention too. One detail is easy to miss. Paint thickness and trim design vary across vehicles, so a familiar setup may not fit another roof correctly. Even careful installers can overlook slight movement after the first drive. Check every contact area, tighten the fittings evenly, and inspect for fresh dust lines or dull patches. A thin protective film may help, but it cannot correct a poorly positioned component.

Installation Mistakes That Lead to Scratches

Top 10 Ways a Roof Rack Can Scratch Your Car Paint?

Installation mistakes often cause more damage than the rack itself. During repeated roof-rack inspections, I have found grit trapped beneath mounting pads. That tiny debris can act like sandpaper when the rack moves.

Common mistakes include installing on a dirty roof, dragging the feet across the paint, and placing pads unevenly. Scratches also appear when installers overtighten clamps, use missing rubber pads, or leave metal edges exposed. Twisted straps may rub against the roof. Loose hardware can vibrate during driving. Incorrect bar positioning can concentrate pressure on one small area. Some people also slide the rack during removal, creating long, dull marks.

Use clean water and a soft cloth before installation. Dry the roof completely. Inspect every contact point for grit, cracks, or sharp edges. Place each pad flat, without stretching or folding it. Tighten hardware gradually, following the rack’s specified pressure or torque. Do not guess.

I once rushed a fitting job and noticed faint lines after removing the rack. The pads looked clean, but dust had collected underneath. My judgment was wrong. Now, I lift each corner slightly for a final inspection before driving. A thin protective film can help, but it cannot replace careful fitting. Check the rack again after the first short trip, especially if the road was wet or dusty.

How Vibration and Shifting Loads Damage the Paint

Top 10 Ways a Roof Rack Can Scratch Your Car Paint?

How Vibration and Shifting Loads Damage the Paint

Vibration is the quiet cause of many roof-rack scratches. Every speed bump, pothole, and hard brake can move the load slightly. That movement transfers force into the rack’s feet, pads, and contact points. Dust trapped underneath then acts like fine sandpaper. The damage may appear as dull circles, thin arcs, or paint scuffs around the mounting area. Small particles can create visible marks within a single trip.

The Federal Motor Carrier Safety Administration emphasizes regular cargo checks because shifting loads can reduce securement effectiveness. Its guidance requires cargo restraints to withstand forces from braking, turning, and acceleration. These forces also affect passenger-car roof systems. The 2016 AAA Foundation report recorded about 500 deaths and 39,000 injuries linked to unsecured loads from 2011 to 2014. That report concerns road safety, not paint, but it shows how movement can become serious.

A practical inspection should include the rack pads, mounting towers, and load straps. Look for flattened rubber, grit, cracked padding, or polished paint. Tighten only to the vehicle maker’s specified limit. Excessive pressure can damage clear coat or distort thin roof panels. I have found that “tight enough” is often judged poorly. Recheck the setup after the first 20 miles, then inspect it after every long journey. Keep the contact surfaces clean and dry. Never ignore a faint rubbing sound.

How Dirt, Moisture, and Wear Increase the Risk of Scratches

Top 10 Ways a Roof Rack Can Scratch Your Car Paint?
How Dirt, Moisture, and Wear Increase the Risk of Scratches

Dirt trapped beneath a roof rack foot acts like fine sandpaper. Road dust can settle on the roof before installation. If the contact area is not cleaned, tiny grains move under pressure. Moisture makes this problem worse. Wet grit sticks to paint and stays hidden longer. Mud can also harden around mounting points. I have seen light marks appear after only a few trips.

A shifting rack creates repeated friction. Loose fittings may let the feet slide during braking or strong wind. Over-tightened hardware can press dirt into the clear coat. Worn rubber pads may expose rough edges. Cracked pads deserve attention. Rust, salt, and dried water spots can create abrasive surfaces near clamps. Even removing the rack carelessly can drag debris across the roof. Lift it straight up when possible.

Cleaning technique matters too. Wiping a dry, dusty roof spreads particles across the paint. Rinse first, then use a soft, clean cloth. Check beneath the pads after wet journeys. Letting moisture remain trapped may leave stains or encourage corrosion on metal parts. I once treated a rack as “clean enough” and missed grit around one foot. That small oversight caused a visible arc. Inspect the contact points regularly, especially after gravel roads, storms, or winter driving. Some scratches may come from poor preparation, not the rack itself.

Top 10 Ways a Roof Rack Can Scratch Your Car Paint? - How Dirt, Moisture, and Wear Increase the Risk of Scratches

No. Scratch-Causing Factor How Paint Damage Occurs Conditions That Increase the Risk Typical Risk Level Common Warning Signs Practical Prevention
1 Dirt trapped beneath the mounting feet Dust, sand, and road grit become abrasive particles between the rack foot and the painted surface. Movement or vibration can rub these particles against the clear coat. Unwashed vehicles, dusty roads, construction areas, and frequent rack use. High Fine parallel marks or dull patches directly under or around the rack feet. Clean and dry both the roof and rack feet before installation. Remove trapped grit rather than wiping it across the paint.
2 Moisture and trapped mud Water softens and holds dirt against the surface. Repeated wet-and-dry cycles can leave abrasive residue under the contact points. Rain, snow, humid climates, muddy routes, and leaving the rack installed for long periods. High Water marks, muddy outlines, or light scuffing around the mounting areas. Inspect contact points after wet trips, rinse away mud, and allow the roof and pads to dry before refitting.
3 Worn, damaged, or contaminated rubber pads Compressed, cracked, hardened, or dirty pads may expose harder surfaces or allow grit to contact the paint. Long-term use, ultraviolet exposure, heat, chemical contamination, and visible pad cracking. High Uneven pad marks, exposed plastic or metal, cracking, hard spots, or missing sections. Replace deteriorated pads and clean them with mild soap and water. Do not use abrasive cleaners.
4 Loose mounting hardware A loose clamp or foot can shift during driving, creating repeated rubbing and concentrated pressure on the paint. Incorrect installation, vibration, repeated loading, or hardware that has not been inspected. High Rack movement, fresh scuff marks, clicking noises, or wear concentrated along one edge. Follow the vehicle and rack installation instructions. Check alignment and tightness before every trip.
5 Over-tightening the clamps Excessive clamping force can compress the pads, increase friction, and deform or displace protective materials. Using tools instead of the specified tightening method, uneven adjustment, or forcing a poor fit. Medium Deep impressions, compressed rubber, paint transfer, or marks appearing immediately after installation. Use the specified tightening procedure and stop when the correct fit is achieved. Never force the hardware.
6 Rack installation or removal while dirty Sliding a foot, clamp, or crossbar across a dusty roof drags hard particles over the clear coat. Quick removal after off-road travel, dry weather, visible dust, or rushing the installation process. High Long directional scratches that follow the path of the rack component. Lift components clear of the roof whenever possible. Wash or carefully rinse the contact area before moving the rack.
7 Metal edges, fasteners, or exposed brackets Uncovered metal edges can cut or scrape the clear coat when the rack shifts or when parts are placed on the roof. Missing end caps, bent components, incorrect assembly, and collision damage to the rack. High Sharp scratches, chipped paint, exposed metal, or damage with a defined hard edge. Replace missing caps and damaged parts. Keep metal hardware from contacting painted surfaces during handling.
8 Improperly positioned protective film or tape Wrinkles, lifted edges, trapped dirt, or unsuitable adhesive materials can create abrasive ridges and localized rubbing. Incorrect placement, old film, high heat, repeated removal, or applying tape over a dirty surface. Medium Residue, adhesive lines, raised edges, or scratches matching the edge of the film or tape. Use paint-safe protective material, apply it to a clean dry surface, and replace it when lifting or heavily contaminated.
9 Excessive load, wind, or aerodynamic movement Loads above the permitted limit or poorly secured cargo can increase vibration and make the rack move against its contact points. High speeds, strong crosswinds, uneven loads, loose straps, or exceeding the vehicle or rack load rating. High Fresh rubbing after highway travel, shifted feet, strap marks, or visible movement of the cargo system. Stay within the lower applicable load rating, secure cargo evenly, and recheck the rack after a short distance.
10 Long-term contact and neglected cleaning Continuous pressure, vibration, and accumulated contaminants gradually wear the clear coat even when the rack appears stationary. Permanent installation, seasonal storage on the vehicle, infrequent washing, and repeated exposure to salt or pollution. Medium Faded contact outlines, cloudy patches, surface dullness, or slowly expanding scuff marks. Remove the rack when it is not needed, clean the contact areas regularly, and inspect the paint and pads at scheduled intervals.

Risk levels are qualitative and depend on rack design, installation quality, vehicle paint condition, weather, road conditions, and maintenance frequency.

Ways to Inspect and Maintain a Roof Rack to Protect Paint

Before each trip, inspect the roof rack where its feet meet the roof. Look for trapped grit, dried mud, or tiny stones; even a grain can rub paint when the rack shifts. Wipe the contact pads and nearby roof with a clean, damp microfiber cloth. Use a separate cloth for the rack, so dirt does not travel back onto the paint. Check that every pad lies flat and feels soft, not cracked or hardened. Small details matter.

After driving on dusty roads or in rain, clean the contact points again. Check straps, clamps, and fasteners for looseness, following the rack maker’s instructions for fit and tightening. Too much pressure can also harm the finish, so avoid overtightening. A thin protective film beneath the feet may help, but it must stay smooth and clean; wrinkles can collect grit. Inspect beneath it regularly.

Don’t guess.If you see fresh scuffs, stop using the rack until you find the cause. I would not assume a scratch came from the rack alone: cargo movement, poor alignment, or an old dirty pad may be responsible. Take a close photo before cleaning, then compare the same area after the next use.

FAQS

How can vibration scratch car paint under a roof rack?

Road bumps can shift the rack slightly. Dust beneath the pads then works like fine sandpaper.

What paint damage should I look for?

Check for dull circles, thin arcs, scuffs, or polished patches near the mounting points. Small marks matter.

Which parts need inspection before driving?

Examine the pads, mounting towers, straps, clamps, and fasteners. Look for grit, cracks, flattening, or hardened rubber.

How should I clean the contact areas?

Wipe the roof and pads with a clean, damp microfiber cloth. Use separate cloths for the rack and paint.

Can overtightening damage the roof or finish?

Yes. Excess pressure can harm clear coat or distort thin roof panels. Follow the vehicle’s specified tightening limit.

When should I recheck the rack?

Recheck it after the first 20 miles. Inspect it after every long journey, especially following rain or dusty roads.

Can a protective film prevent scratches?

It may help beneath the feet, but it must remain smooth and clean. Wrinkles can trap grit.

What should I do after finding a fresh scuff?

Stop using the rack temporarily. Photograph the area before cleaning, then check alignment, cargo movement, and pad condition.

Is every scratch caused by the rack?

Not always. Old dirt, moving cargo, poor alignment, or another contact point may be responsible. I could judge this wrongly.

Conclusion

A roof rack can scratch your car paint when its bars, feet, clamps, or other contact points rub against the roof. Poor installation can increase the risk: loose fittings may shift, while overtightened or incorrectly positioned components can press against the finish. Over time, vibration from driving and movement of an uneven or unsecured load may cause repeated friction, leaving scuffs or scratches that are easy to overlook at first.

Dirt trapped beneath the rack can act like an abrasive, and moisture may contribute to wear where components meet the paint. Regular inspection and simple maintenance can help reduce these risks. Check that the rack is correctly fitted and secure, keep contact areas and the roof clean, and look for worn pads, loose parts, or signs of movement. If you are wondering, can a roof rack scratch your car paint, the answer is yes—but careful installation, clean contact points, and routine checks can help protect the finish.

Isabella

Isabella

Isabella is a dedicated marketing professional with a sharp focus on driving brand growth and engagement through strategic content creation. With an extensive background in digital marketing, she combines her passion for storytelling with her keen understanding of industry trends to deliver......